
We’ve all been there: you’re ready to grill, and then, oh – your grill grates look like they’ve seen better days.
Whether it’s last week’s burger remnants or caked-on grease from your last big BBQ party, it’s time to give those grates some love, don’t you think?
But hey – don’t worry.
We’ve got all the tips and tricks you need to keep your grill grates ready for the next grilled meal!
Cleaning grill grates may not seem like a big deal. But trust us, it impacts more than just appearance!
Leftover residue can affect the taste of your food and even cause flare-ups. Plus, regular cleaning helps prevent rust, keeping your grates functional longer.
So, whether you’re looking to clean grill grates after a big barbeque or get ready for the next cookout, this is the guide for you!
PS. if you’re rocking a Traeger grill or a Weber grill, we’ve got dedicated guides for how to clean a Traeger grill and how to clean a Weber grill!)
Before we dive into the materials, here are some golden nuggets of wisdom to make the process smoother, quicker, and a lot less difficult for you:
Keeping your grates clean is key to their longevity. But sometimes, wear and tear means you’ll need a replacement.
If your grates are beyond saving, it might be time to browse our collection of grill parts to get your grill back to peak performance.
Now that you’re armed with our pro tips, let’s dive into the best way to clean grill grates based on what they’re made of.
Different grill grates come in all shapes and materials and require different care. Cast iron, stainless steel, and porcelain grates each have their own set of cleaning needs – and knowing how to treat each one is key to keeping them in perfect grilling condition.

Ah, the trusty cast iron. Cast iron grill grates are durable and can retain heat so well – but they do need a little extra TLC.
Cast iron grates love heat, but they can rust, you know. This method gives them the TLC they deserve:
Stainless steel grill grates are the low-maintenance champs of the grill world. They’re resistant to rust and corrosion, making them easier to clean.
… But don’t skip the cleaning entirely!
Porcelain-coated grill grates are perfect for even cooking… but they can chip if you’re too rough with them – and you wouldn’t want porcelain chip in your food, would you?
If your porcelain grates are beyond repair, or if you’re just looking to upgrade, check out our range of replacement grill parts for over 280 brands. Whether you need a fresh set of grates or other grill parts, we’ve got your grill covered!
If you’d rather skip the baking soda, vinegar, and elbow grease, we’ve got an alternative for you – but it’s only if you’re in no rush for instant gratification!

Whether you’ve got cast iron, stainless steel, or porcelain grill grates, keeping them clean is the best way to ensure your grill lasts and your food stays tasty. So go ahead and preheat the grill, use the right brush, and take care of the grates according to their material.
And remember: a little regular maintenance goes a long way!
If you’re thinking, “Wait, what about the rest of the grill?” then check out our complete guide for how to clean your grill. Oh, and don’t forget to check out how to clean a flat-top grill or griddle if that’s your style!
If cleaning your grill grates just isn’t cutting it, it might be time for a fresh start.
No worries, we’ve got you covered there, too! Whether your grates are looking a little worse for wear or you just want to upgrade, we have an awesome collection of cooking grids to choose from:
No matter what type of grid you need, we’ve got one that’ll fit your grill and cooking style. Check out our collection of rock grates – or browse our full range of grill parts by category.
Quick answer: brush them off after each grilling session! For deep cleaning, if you’re a frequent griller (think once a week or more), aim for every 4-6 months. If you’re more of a casual cookout type, once a year will do the trick.
Ah, you really don’t want to go there! Neglecting your grates means rust, decay, and pretty gross-tasting food. Plus, who wants their steaks flavored with old grease? Regular cleaning keeps your grates in top shape and your food delicious.
Surface rust? You’ve got this! A good scrub or seasoning with oil can handle most rust situations. But if your grates are deeply rusted or pitted, it’s time to say goodbye and get a replacement. Don’t grill on badly rusted grates – it’s just not worth it!
There comes a time when even the best grates need retiring. If the rust won’t budge, your porcelain coating is chipping, or they just refuse to clean no matter what you do, it’s probably time to swap them out. Keep an eye out for these signs and treat your grill to some shiny new grates!
Whether you’re using baking soda, grill cleaner, or even steam, all these methods will help you tackle those burnt-on bits. Just follow our cleaning tips, and you’ll be back to grilling in no time!
Soleen September 18th, 2024
Posted In: BBQ Maintenance, BBQing HowTos
Keeping your Traeger grill clean is key to making sure it works well and keeps delivering those delicious, smoky flavors you love.
Luckily, with just a few easy-to-follow steps and a little know-how, you can get it done in no time.
In this guide, we’ll show you how to clean a Traeger grill and get into the nitty-gritty of cleaning key components like the pellet system, grates, and grease traps.
Let’s get started!

You might be thinking, “I just used it to grill up some burgers. Do I really need to clean it already?”
The answer is a big, fat yes!
Leftover grease, ash, and food particles can build up over time. This can mess with your grill’s performance, affect the taste of your food, and even lead to safety issues like grease fires.
No one wants their next burger tasting like last week’s BBQ chicken, right? Regular cleaning not only keeps your grill in top shape but also helps your food taste amazing and fresh every time.
Plus, it’s a great way to prevent rust and extend the life of your Traeger!
If you notice your grill’s looking a little worse for wear, you might need to replace a part or two. No worries – you can find all the parts you need at Appliance Factory Parts.
Before we get into the cleaning process, here’s a quick rundown of when you should be cleaning your Traeger grill:
Now, let’s get to the fun part – how to do all of the above!
First things first – let’s talk grates. After every BBQ session, they’re going to have some leftover food and grease, and if you don’t clean them, that gunk is just going to build up.
And let’s be honest, no one wants a dirty grill ruining a good steak!

Here’s how to keep your Traeger grill grates clean:
Pro tip: Feeling adventurous? Some people swear by scrubbing grates with half an onion or lemon – gentle on your grill and super effective!
Want more tips? Check out our post on how to clean grill grates for more in-depth advice!
Don’t forget the behind-the-scenes heroes of the pellet system: the hopper, auger tube, and firepot.
Whether you’re using a Traeger Redland or a Mesa Pellet Grill, the pellet system is the heart of your Traeger pellet grill – and it needs a little TLC to keep those smoky flavors coming.
Here’s how to keep it in top shape:
Need tools for this job? Check out our grid cleaning brushes, Venturi cleaning brushes, and basting brushes to get the job done right.
While the hopper handles the pellets, the grease channels make sure you don’t end up with unwanted flare-ups. So make sure to clean them out regularly to prevent blockages.
If your grill has a chimney, don’t forget to clean it out, too.
Pro tip: Keep an eye on these areas to avoid grease fires and help extend the life of your Traeger.
The grease trap does all the dirty work, catching drips and grease. But if you forget about it, you’re in for a nasty surprise.
Clogged grease traps can cause flare-ups and smoke. That’s something you definitely don’t want during your cookout!
So, make it a habit to empty the grease trap regularly. Don’t wait until it’s overflowing!
Tip: If you’ve got a newer Timberline or Ironwood model, don’t forget to clean the grease governor and ash keg!
Every couple of months (or more often, if you’re grilling fatty foods like pork belly), your Traeger is going to need a deep clean to keep it running like new.
It’s not as hard as it sounds – we promise!
Here’s how to deep clean your Traeger grill:
Want more in-depth tips on keeping your grill spotless? Check out our complete guide to cleaning a grill.

By staying on top of these simple steps, you’re making sure every cookout is a success. Trust us – just a little bit of maintenance can make a big difference in flavour.
Whether you’re grilling steaks on a Traeger Mesa Pellet Grill or smoking ribs on a Traeger Redland, a little cleaning goes a long way! Stay on top of regular cleanings, and your grill will be ready to go whenever you are.
Need more cleaning tips? Don’t forget to check out our posts on how to clean a Weber grill and how to clean a flat-top grill for even more handy advice!
Soleen September 11th, 2024
Posted In: BBQ Maintenance, BBQing HowTos
Cleaning might not be the glamorous part of grilling, but it’s definitely one of the most important. Keeping your BBQ grill clean doesn’t just make your food taste better – it also helps it last longer and ensures you avoid any greasy flare-ups while cooking.
The good news? It’s not that hard if you know the right steps!
We’ll walk you through cleaning a grill properly – from gas, charcoal, and propane to pellets and smokers. Plus, we’ll share tips on getting rid of rust and keeping your BBQ grill looking (and working) like new!

If you give your grill a quick clean after every use (and trust us, it’s worth it), you’ll be done in 5 to 10 minutes tops. For those deeper, seasonal cleanings, set aside 30 minutes to an hour, depending on your grill type.
As for what you’ll be needing: when it comes to the best way to clean a grill, having the right tools makes all the difference!
Here’s a quick rundown of what you’ll need for effective grill cleaning:
✅ 1. Safety first – make sure the grill is cool before you get started. But if you’re cleaning after cooking, leaving it slightly warm makes it easier to scrape off gunk.
✅ 2. Remove the grates, flavorizer bars, drip trays, and anything else that comes off. This will make cleaning much easier.
✅ 3. Grab a grill brush and get scrubbing to remove stuck-on food and grease from the grates and inside the grill.
✅ 4. Grill cleaner or soapy water works wonders. Use it to give everything a good scrub. Don’t forget to clean the inside of the grill, too!
✅ 5. Once you’ve scrubbed everything, rinse with water and dry the parts thoroughly to prevent rust.
✅ 6. Put everything back together, and voilà – your grill is clean and ready for the next BBQ!
Browse Our High-Quality Grill Brushes
Gas grills are great for quick and easy cooking, but they do need some extra TLC when it comes to cleaning.
Here’s how you can keep yours clean:

If you see buildup on the grill hood, a quick wipe with hot, soapy water and a scour pad should clear it up – luckily, this doesn’t need to be done too often.
While you’re at it, take a look at the burner ports. If any of them seem blocked (no flames where there should be), turn off the burners, close the propane tank, and use a wire poker (or a metal wire or cake tester) to clear any obstructions.
Need replacements for parts like burners or heat deflectors? Check our gas grill parts to find what you need.
Charcoal grills have a simple design, but they can get pretty dirty after just a few uses.

Here’s how to keep them clean:
For tips on how to keep the grill grates clean, check out or post about it here!
Propane grills work just like gas grills, with the added bonus of needing to take care of the propane tank:

Pellet grills need some special attention than your average charcoal or gas grill – but the flavor payoff is worth it!
Since you can’t just hose down a pellet grill (too many electronics!), you’ll want to remove the grates and grease pan to clean them properly. Plus, wet wood pellets can expand, leading to dreaded auger jams – so definitely keep the garden hose away!
Follow these guidelines to be safe:

Got a Traeger pellet grill? Check out our article about how to clean a Traeger grill in simple steps!
Smokers can get pretty dirty due to the long, slow cooking process. Follow these guidelines to keep them clean:
Got a bit of rust? Don’t worry, it happens to the best of us – but it doesn’t mean your grill is doomed!
Here’s how to bring it back to life:

Got a stubborn rust spot? Try one of these easy fixes:
Make Cleaning Easy With Our Grill Brushes
Whether you’ve got a gas, charcoal, pellet, or propane grill, cleaning it regularly is key to better-tasting food and a longer-lasting grill. It might seem like a hassle at first, but once you get into the groove, it’s easy!
Keep your grill clean, and you’ll always be ready to fire it up for that next backyard BBQ.

The easiest way is to scrub the grates with a grill brush while they’re still slightly warm, then wipe them down with a damp cloth. For a deeper clean, grab some soapy water or a grill cleaner.
Give the grates a quick scrub after every cook. For a deep clean, once a season should do the trick, depending on how often you grill.
Tackle the rust with a wire brush, then mix up some vinegar and baking soda to scrub it off. Rinse it well and let it dry before firing up the grill again.
Soleen September 10th, 2024
Posted In: BBQ Maintenance, BBQing HowTos
Great grilled food starts with a good cooking grid. It’s the secret to sensational sear marks, that sought-after crusty exterior, and maximum grill flavor. If your cooking grid is rusted, warped or burned through in spots, it might be time to replace it. Here’s what you need to know if you’re in the market for a new one.
Why is a good cooking grid important?
Outdoor grilling almost always involves three types of heat energy to cook food: radiant – the infrared energy generated by a charcoal or gas fire that excites and heats the molecules within food; convection – the movement of hot air inside the closed hood of the grill; and conduction – when food comes in direct contact with a hot surface. Cooking grids are responsible for conduction cooking and are what makes grilling … well, grilling.
Most cooking grids are made from one of five materials – chrome-plated steel, porcelain-coated steel, cast iron, porcelain-coated cast iron, and stainless steel. Each offers distinct differences in durability, how they retain and transfer heat, how easy they are to clean and maintain, and how much they cost.
The bars within a cooking grid come in different shapes and thicknesses and can be spaced close together, wide apart or somewhere in between. The configuration of the grid can impact cooking performance almost as much as the material they’re made of.
HOT TIP: Wider bars on a cooking grid offer more surface area for contact with the meat. This creates more pronounced grill marks.
The five main cooking grid materials:
HOT TIP: To make those iconic, cross-hatch grill marks, rotate food a quarter turn halfway through the cooking time required on the first side. Then repeat the process on the second side.
A pound of prevention…
A little ongoing maintenance will help preserve your cooking grid for years to come, no matter the material or configuration. Whether you’re grilling filet mignon or a humble hot dog, it’s important to start with a clean, hot, oiled cooking grid.
For a complete list of replacement cooking grids, select your brand and model.
David B. June 16th, 2015
Posted In: BBQ Maintenance, BBQing HowTos
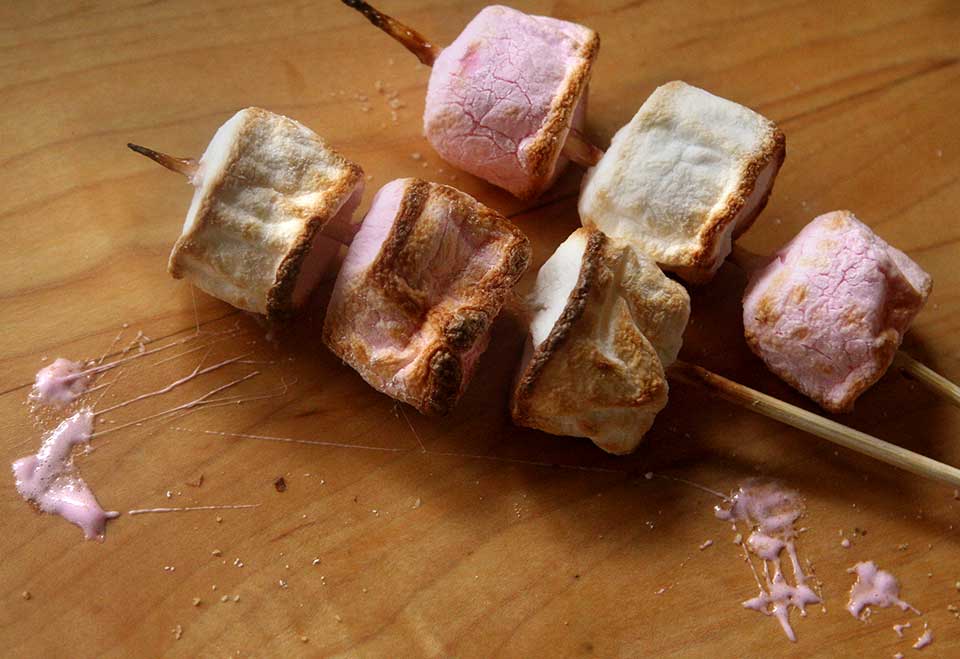
Do you count the days between camping trips? Do you dream of golden roasted marshmallows? Do visions of crispy blackened sugar balls haunt your sleep? Well, my friend, there is a better way.

1 Pack of marshmallows
1 Block of chocolate; shaved, grated, chopped, (or cut into decadent slabs)
1 Packet of graham crackers, shortbread cookies, ginger snaps, (or Oreos twisted open, depending how sacrilegious you’re willing to get)
Just like you would at a campfire. Skewer the marshmallows. Hover them over the grill; close, but not too close.
A temperature of 500-600 F works perfect for me. I simply rotate the marshmallows over the heat for 30 seconds or so, and I’m done.
Slide the marshmallow(s) onto your cookie surface of choice.
Add some chocolate.
Properly squish it.
Eat.
And there you have it. S’mores in 30 seconds, at the end of every grilling session. Who needs camping?
David B. April 7th, 2014
Posted In: BBQing HowTos, Desserts & Fruit, Recipes
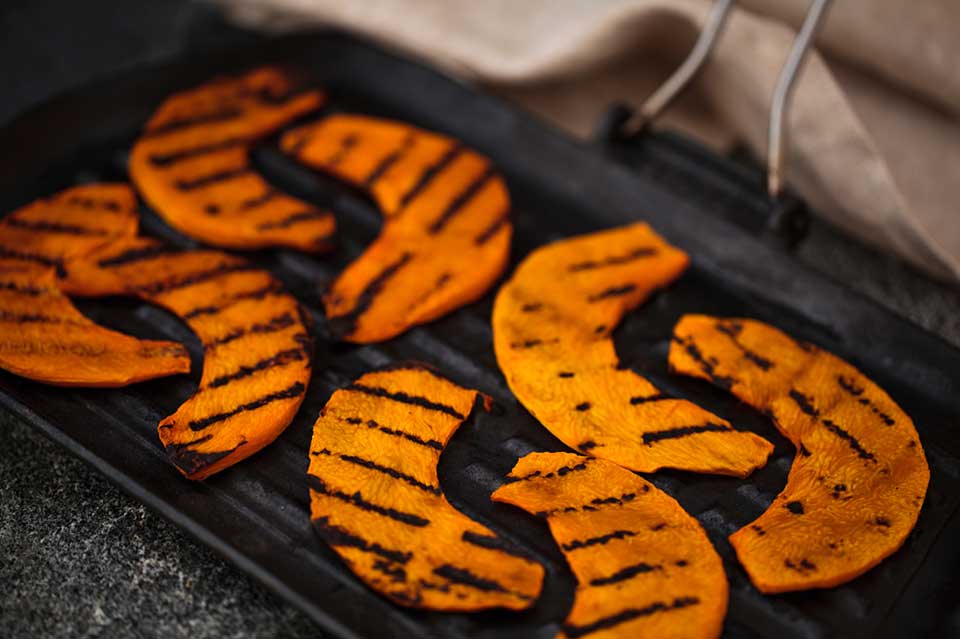
If you need an excuse to get out on the grill this Thanksgiving, here it is: Grilled Pumpkin. A savory treat that’s easy (provided you are careful cutting the pumpkin) and delicious.
Improvise as you like, pumpkin holds up well to lots of different flavors. Here’s a recipe to guide you.
1 Pumpkin (per 1 lb)
2 tablespoons smoked paprika
2 tablespoons olive oil
2 crushed garlic cloves
Preheat your grill / BBQ for medium-hot, direct grilling. Cut pumpkin into 1/2 inch thick wedges . Deseed
Tip: Leave the skin on so the pumpkin slices stay together. Trim off skin before serving if you like.
Mix paprika, olive oil and garlic in a bowl with the pumpkin.
Grill the pumpkin 3-5 minutes on one side, turn and cook until tender. The pumpkin slides should be fork tender.
David B. November 18th, 2013
Posted In: BBQing HowTos, Vegetables

Ideally, try to get grass raised sausages from a local butcher, or good supermarket. Look at the ingredients, are they filled full of fillers, and preservatives? Then there is a pretty good chance they be pretty tasteless. Make sure they’re uncooked, not precooked sausages too.
You can cook sausages indirectly or directly, but I think they taste best and are easiest, barbecued indirectly with the lid down.
Indirect grilling
If you were to bake sausages in the oven, you’d cook them at 350 degrees for 20 mins, and that’s exactly what you’d do with a barbecue. Set up your barbecue or grill for indirect grilling, at 350 degrees. Cut the sausages between the links, and place sausages on the grid with as much flamboyance as you can muster. Close the lid, and that’s it. Open it back up in about 20 mins. Exceptional grilled sausages.
Direct grilling
It’s more difficult to grill sausages directly, and you do have to tend and keep turning them, but it’s still pretty simple with practice.
The most common problem people have when grilling is to have the temperature too high. That normally means the sausages will burn on the outside before they cook completely in the middle. Or look great on the outside, but still pink in the middle.
Make sure you keep your sausages as far from the heat as possible and keep it turned way down. Just like the indirect method, you want to grill your sausages low and slow, turning frequently.
Whichever way you decide to cook them, it’s important to regularly keep an eye on the temperature of your sausages. They need to be at 160 degrees, any higher and they start to dry out quickly. Any less and they will be undercooked.
David B. September 13th, 2013
Posted In: BBQing HowTos
In May, I first wrote about cooking pizza on the BBQ. This is a follow up post of sorts. Truth be told, homemade pizza on the BBQ has quickly become a family meal in our home, and our go to meal for indulgence and piggery.
Barbecuing pizza is not in any way a gimmick (something that you wouldn’t normally do, but do because you just love grilling)–it produces genuinely fantastic results that are better most pizza restaurants. It’s impossible to get pizza as good in your home oven.
Pizza peel – to transfer to the hot stone on the BBQ
Pizza stone
A BBQ or gas grill with a lid capable of getting to about 500 – 650 degrees, ideally 600-650
You’ll also need some cornmeal to sprinkle on the pizza peel
1/2 cup warm water (110 degrees)
1 envelope instant yeast
1 1/4 cups water; at room temperature
2 tablespoons extra virgin olive oil
7.5 ounces of fine semolina flour (1 1/2 cups) + 14.5 ounces of bread flour (2 1/2 cups), OR 22 ounces bread flour (4 cups)
1 1/2 teaspoons of salt
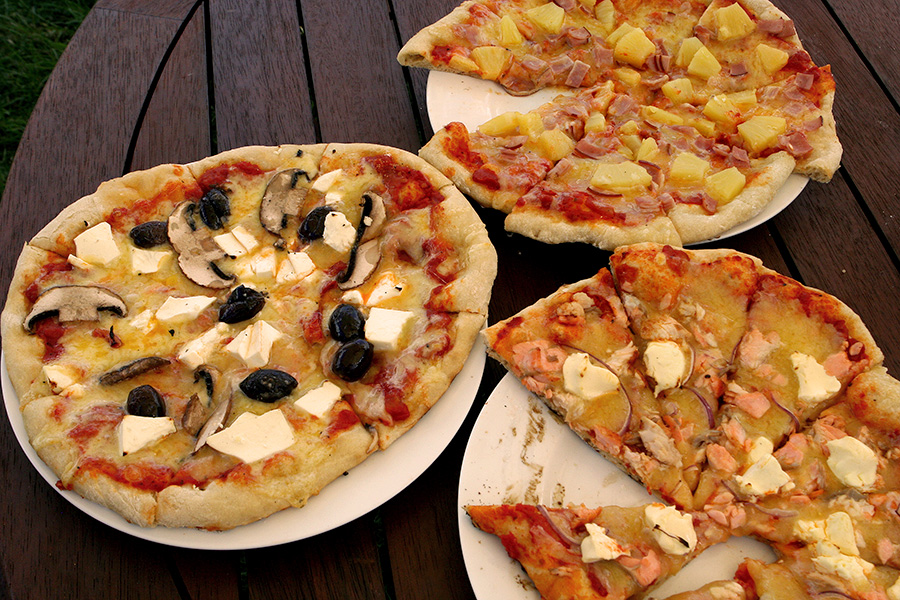
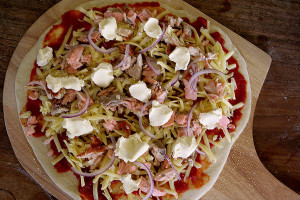
Ingredients for a pizza are kind of like a sandwich; whatever you have at hand, or feel like on the day. Mozzarella, pizza sauce, pepperoni, ham, pineapple, salmon, cream cheese, mushroom, onion, etc!
My three pizzas were: ham and pineapple; salmon (pre-cooked in the frying pan), red onion, and cream cheese; mushrooms, kalamata olives, and feta cheese.
Step 1. Prepare the Yeast. Add the warm water into a 2 cup measuring jug. Sprinkle the yeast and let it stand for about five minutes, or until the yeast swells.
Step 2. Add the room temp water, and olive oil, and stir.
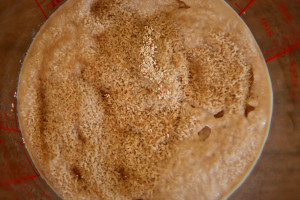
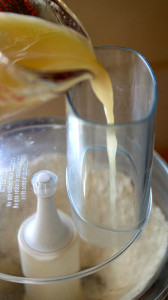
Step 3. Whizz the flour and salt in the food processor for 10 seconds. Add the yeast mixture while the food processor is running.
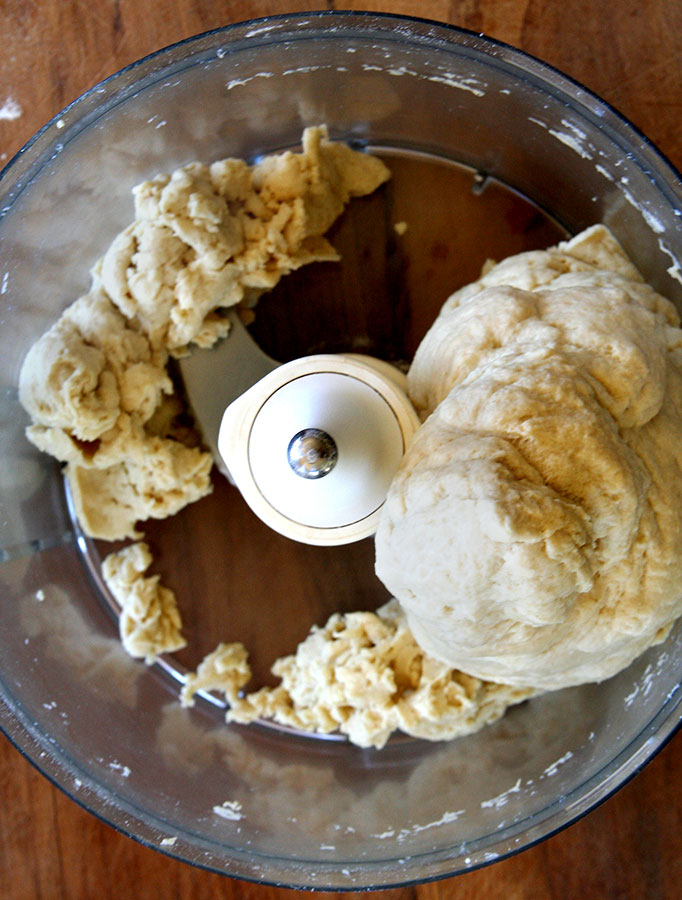
Step 4. Run the food processor until the mixture combines to a ball. Continue to process the dough for another 20-25 seconds. There will be a few stray pieces of dough (as pictured).
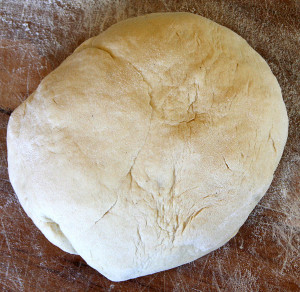
Step 5. Dump onto a floured prep surface and hand kneed a few times to finish off. The dough should be slightly elastic. Oil a large bowl, big enough for the dough to at least double in size. Add the dough and cover with plastic wrap. Put the dough somewhere warm for 2 hours, or until the dough doubles in size. Take a break, you’ll need to start preparing the BBQ and pizza toppings in about an hour.
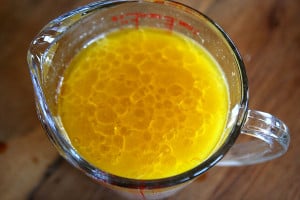
Step 7. Prepare the toppings, and crank up the BBQ. For the sauce I’ve simply been using two cans of good canned tomatoes. Season them well and cook them low and slow for about 30 minutes, or until pizza sauce consistency is reached. You want all of your pizza toppings prepared and ready at hand, so cook/take out of packing/wash everything. Everything needs to be done very quickly, and you won’t have time to mess around.
At about 90 mins into the dough rising, load up your coals, or start up your grill. Pop your pizza stone on the cooking grid and close the lid. You want to get your BBQ really hot, around 600-650 degrees. Great care is obviously necessary at these temps (even when opening the lid).
NB: Never put a cold pizza stone on a hot BBQ, always heat the BBQ up as you heat the stone up. Also don’t leave the pizza stone on top of the pizza grid after the BBQ has cooled. Moisture can be trapped between the grid and the stone and cause your grid to rust prematurely.
Step 8. After the dough has risen. Separate the dough out in thirds. Roll or stretch one third on a prepared surface and transfer to a pizza peel sprinkled with cornmeal.
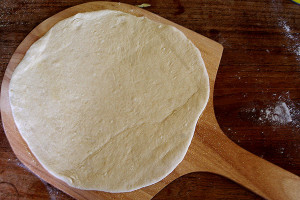
Step 9. Add your toppings
Step 10. Carefully transfer the pizza from the peel onto the pizza stone on the BBQ. Shut the lid as soon as possible and wait. Stay close to the BBQ and it wouldn’t be a bad idea at all to peak after just a couple of minutes to see how it’s going. It’s so easy to burn and a little heart breaking to have a fantastic looking pizza with a burned bottom. Here’s my ham and pineapple going on, yes I like a lot of pineapple on my Hawaiian pizzas.

Step 11. Repeat for the other two pizzas, then eat.
David B. January 4th, 2013
Posted In: BBQing HowTos, Recipes

Planking is a great, easy way to grill; and is particularly suited to delicate foods like fish. The wood plank protects the flesh from the intensity of the flames or burners while imbuing it with delicious smokey flavors. However longer cooking meats like chicken will always pick up more smokiness since they’re exposed to the smoke for much longer.
And planking isn’t only for those cooking with charcoal, this technique works perfectly on gas grill as well!
You can use a variety of timber for planking, cedar isn’t the only option. Apple, alder, hickory –just be sure the wood isn’t treated!
Before grilling, the wood needs to be soaked it in a tub of water for at least an hour (to reduce the chance of it catching on fire). For another layer of flavor try adding a cup of juice or a splash of bourbon to the soaking water.
After soaking, put the plank on a preheated medium grill for a couple minutes on each side. You want the plank to be smoking and cracking before you put your food on it –this will make sure you get the maximum smokey flavor.
Now you’re ready to cook! Brush some oil on the hot plank, and put your food directly on it. No turning needed. Be sure to keep the lid closed as much as possible since a lot of the flavor from planking comes from the smoke.
A few other notes:
Be sure to keep a spray bottle on hand while cooking on a plank. The wood can catch fire, you need to be able to quickly extinguish any flare-ups.
Even though salmon is the traditional planking food, don’t limit yourself. Pretty much any fish is delicious cooked in this way. Also chicken, pork loins, vegetables. Really, anything you’d cook over an indirect heat. Marinate and season as you’d like, then cook it on the plank.
Cedar planks can be reused a number of times, as long as there is wood left. Depending on the length of cooking, I would expect around three uses. Don’t forget to soak it before each use.
Be sure to remove the plank as soon as you’re done cooking, otherwise the wood will just burn up. And if you’re using a gas grill, it will make a big mess in your burners.
Sauce:
1/4 cup pineapple juice
1/3 cup soy sauce
2 tablespoons apple cider vinegar
2 tablespoons lemon juice
1 tablespoon olive oil
3/4 cup honey
1/4 cup brown sugar, packed
1/2 teaspoon cayenne pepper
1/2 teaspoon paprika (Preferably hungarian paprika. Try smoked paprika for an even bigger punch. Or even smoked spicy paprika.)
1 garlic clove, minced
Freshly ground black pepper (about a teaspoon)
6 salmon filets, skinless and boneless
Salt
Freshly ground black pepper
2 cedar planks
Directions:
Prepare the planks as above.
Preheat the grill, medium heat.
Put the juice, soy sauce, vinegar, lemon juice, oil, and honey in a small saucepan and bring to a simmer over med-high heat. Reduce to med-low and stir in the rest of the sauce ingredients, cooking until it has reduced to and coats a spoon. About 20 minutes. Remove from the heat.
Sprinkle the salmon filets with salt and pepper
Your cedar planks should be finished soaking and be ready to put on the preheated grill. Leave them for a couple of minutes over the burners, until they start to smoke, then brush them with oil and pop the salmon filets on top. Close the lid, cook for 5 minutes, then spread a little of the sauce over the salmon. Put the lid back on and cook another 5 minutes. Apply another layer of glaze to the fish. Cook another 5 minutes or until the fish is opaque throughout.
Serve with the rest of the sauce, and enjoy. 🙂
David B. September 3rd, 2012
Posted In: BBQing HowTos, Meat Poultry & Fish, Recipes

Grilling a pizza is one of those things that I’ve always planned to get around to.. in the future. Maybe it was the tinge of weirdness, or additional steps required after making a pizza by hand, but I’ve always decided to do it a different day, or a different occasion. Procrastination aside, I finally started trying to grill pizzas over the last few weeks, and it’s been a revelation. Not of divine proportions, but probably about as close as you could get from a pizza lover. The fantastic thing about cooking pizza on the grill is you can get the pizza to a much higher temperature than a conventional oven. You also get a smokey, barbecuy taste that can’t be matched.
Grilling is always an imperfect science at the best of times. Getting the condition right for your particular grill or barbecue takes time. We had a few disasters here, quite a few.. 2 totally burnt pizzas, a dropped pizza (that one almost ended in tears), and a few that still tasted good but I knew could be better. So don’t despair, it’s worth the persistence, well worth it!
Because the pizza cooks so fast, and the heat can be very very hot, we’ve found you get more consistent results with a thin base and thin toppings. Feel free to experiment.
Using a gas grill: Make sure your burners are in tip top shape, and not producing any hotspots Using a charcoal bbq: Keep your coals even across the span of the pizza stone.
There are two schools of thought with grilling pizzas. One is to cook your pizza straight on the grid with an indirect heat source. The other is to use a pizza stone. Using a pizza stone tended to even out the heat a lot better, reduced the risk of burning the pizza, and of course you can compile the pizza in the kitchen rather than on the grill itself.
This recipe is great on the grill. It makes 2-3 pizzas depending on the size of your pizza and how much pizza dough is stolen. I tend to split the pizza dough in thirds, use one, and wrap the other two separately with lots of plastic wrap and store it in the fridge.
1/2 cup warm water (110 degrees)
1 envelope instant yeast
1 1/4 cups water; at room temperature
2 tablespoons extra virgin olive oil
22 ounces bread flour
1 1/2 teaspoons of salt
1. Sprinkle yeast onto the warm water for about 5 minutes. Then add the room temperature water and olive oil.
2. Mix the flour and salt in a food processor. Pulse the food processor while adding the liquid ingredients from step 1. Process until dough comes together, and is smooth and stretchy.
3. Dump out onto a floured work surface. Kneed briefly to form a ball.
4. Put the dough into a large oiled bowl and cover with plastic wrap. Let rise in a warm place, 1/2 to 2 hours.
This sauce is exceptionally simple, and works best with fresh tomatoes, but you could use canned.
1 lb tomatoes
1 Tbsp Olive oil
2 cloves garlic
Salt to taste
1/4 cup good bbq sauce, such as Grumpy’s Goodnight Lovin’
1. Heat a saucepan over medium heat and add the Olive oil and garlic for 30 seconds, being careful not to burn it.
2. Add in the tomatoes and simmer until the tomatoes melt down and thicken, about 20 minutes
4 oz Mozzarella, shreaded or cut half inch thick
8 oz Pepperoni, peeled and thinly sliced
That’s it. You could do whatever you want for a topping and sauce, but remember, be spartan: less is more, especially on the grill.
1. You want an even heat distribution over your grill. If you’re using gas, turn on all burners, if charcoal, spread coals evenly across the bbq. Put the stone in when the grill is still cold, and close the lid for it to preheat (about 20 minutes depending on your grill).
2. Sprinkle semolina or cornmeal onto a pizza peel, then place your pizza dough onto the peel. If you don’t have one, you might need to improvise a little.
3. Add the sauce, and toppings.
4. Take the pizza peel over to the grill and slide the pizza onto the pizza stone.
5. Cooking times vary greatly but you want to take the pizza off when the crust starts browning in spots, about 5-10 minutes. Be sure not to leave it unattended as it can go from delicious looking to a burnt mess in minutes (from experience).
David B. May 2nd, 2012
Posted In: BBQing HowTos, Recipes