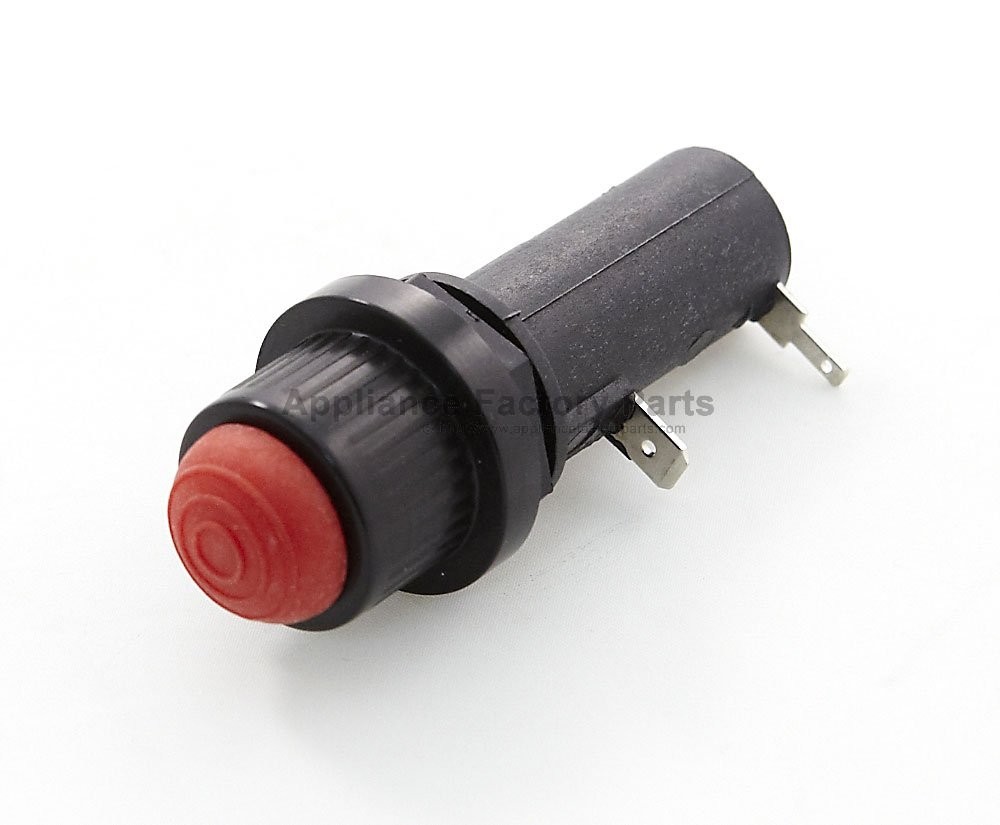
Igniters are responsible for lighting the gas in the grill’s burners. When they work well, igniters make grill-lighting as eay and convenient as pushing a button or turning a dial.
But, not surprisingly, considering they do their job in an abusive environment of high heat, acidic meat drippings, and corrosive weather conditions, sometimes things go wrong. In fact, igniter failure is a common complaint – and source of frustration – for gas grillers.
True, you can usually light the grill by manually inserting a long match or lighter through a hole in the base of the grill. But, replacing the igniter is an easy and relatively inexpensive fix that will have you back in business faster than you can say finger-lickin-good.
Grill igniters use a spark to ignite gas within the burners. The magic happens behind the control panel, where a piezoelectric crystal generates an electric spark when activated. This spark travels through a wire to an electrode tip inside a collector box, where it ignites trapped gas, which then lights the burner.
If none of these easy fixes works, it may be necessary to replace the igniter unit. But before you do, try one more test. Manually light the grill with a match.
If it lights, the problem is likely the igniter. If it doesn’t light, the issue may actually be a clogged or dirty burner. Clean the burner and test the igniter again. If the grill lights, there’s no need to replace the igniter. If it doesn’t, a new igniter will probably do the trick.
Safety Tip: If a grill ever fails to light, always wait 5 minutes before attempting to relight it to allow the gas to dissipate.
Find the right igniter for your grill at Appliance Factory Parts. Select your grill brand and explore our full range of quality replacements to keep your grill in top condition.
David B. April 21st, 2015
Posted In: BBQ Maintenance
Think a high-BTU burner is the secret to the perfect sear on your steak? Think again. The real MVP of your grill’s heat control is the heat diffuser.
It’s a common myth that the higher a grill’s BTU rating, the more powerful it is. But, it’s really the design of the diffuser system together with the burner that determines how hot the grill can cook. A well-designed diffuser system can crank out more heat on a lower-BTU grill than a poorly designed system on a mega-BTU unit. That saves gas and money.
Heat diffusers are like middle children. They’re sandwiched between the burner and the cooking grid, and they’re often overlooked. But, they’re vital to your gas grill’s cooking performance and deserve some attention.
So, let’s dive into why heat diffusers are essential, the different types, and how to keep them working their magic.
Heat diffusers have been used for ages – probably since right after people discovered food tastes better cooked over an open fire. Ancient civilizations realized that by putting stones, rocks or balls made of clay into the fire, they could increase the heat, spread it over a larger area, and make it last longer. Their food cooked better, too.
A barbecue grill works the same way. The burner generates the flames, and the diffusers hold, radiate and distribute the heat for better, more even cooking. Diffusers can bring heat to all areas of the cooking surface, beyond where the burner flames reach.
Depending on the grill brand, diffusers might also be called heat deflectors, heat distributors, flame tamers, burner shields, heat plates, vaporizers, or even flavorizer bars. Whatever the name, diffusers perform 3 important functions to make barbecuing better.
Here’s a breakdown of the three main types of heat diffusers:

Lava rocks are craggy, reddish brown, irregularly shaped pieces of volcanic rock dotted with tiny holes. They were popular on early gas grills, but are less common today. The rocks sit on a rock grate an inch or two above the burner and a few inches below the grilling grid.
They hold and reflect heat well, last long, and are inexpensive. Since they are porous and absorb grease, some believe they create more flavorful smoke. Downsides: they take longer to heat up, and because they’re not uniformly shaped, grease can drip through the gaps between the rocks and reach the burner, causing flare-ups, hot spots, corrosion and clogs.
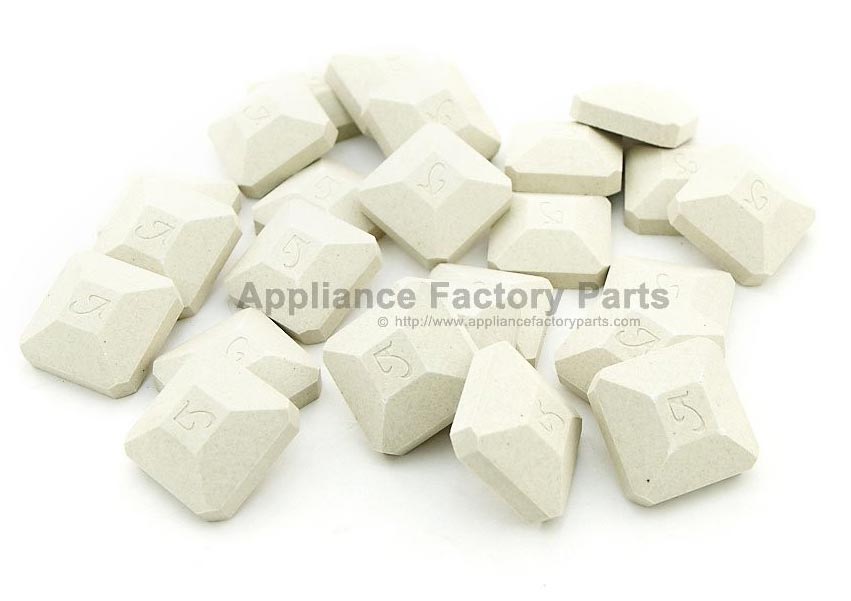
Ceramic diffusers are made of light-colored, heat-retaining ceramic material like the firebrick found inside many pizza ovens. They can be formed into pillow-shaped briquettes, rounded pucks, thin rods, or perforated flat tiles. Aligned edge-to-edge in a single layer, they can protect the burner better and distribute heat more evenly than lava rock. But, there may still be little gaps for grease to slip through and flare up when it hits the burner. Ceramic diffusers last a long time and are relatively inexpensive.
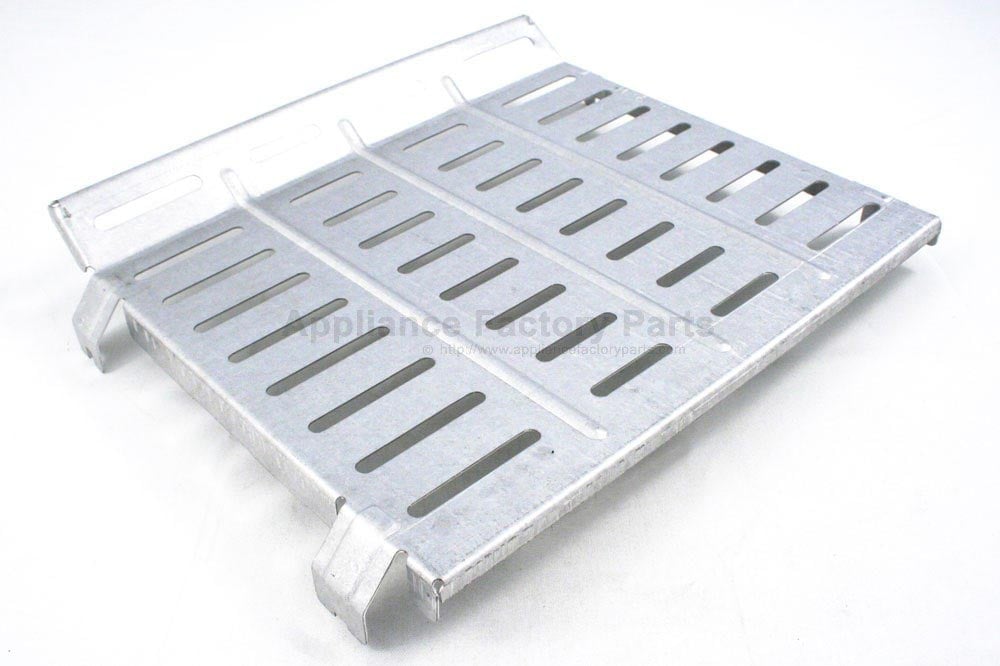
Metal diffusers are most common today. Stainless steel or porcelain-coated steel is formed into inverted-V tents, accordion-folded sheets, or flat plates. The metal heats up fast so the grill is ready for cooking very quickly. The angled diffusers channel grease away from the burner into a drip pan in the base of the grill. Though this virtually eliminates flare-ups, some argue it generates less smoke and flavor. These are also more expensive than other types of diffusers.
To clean ceramic briquettes, flip them over so the soiled side is toward the burner. Turn the burner to high for about 15 minutes and let the grease burn off. If they are especially dirty, use a stiff brush to remove caked-on residue before burning. The process can be repeated whenever grease builds up.
Lava rocks are cleaned the same way. It’s just a little trickier to get the grease out of the nooks and crannies. Also, because they’re porous, lava rock should be cleaned before a grill is put into storage or unused for a period of time, or they can get moldy.
Soak metal diffusers in a tub of soapy water. Use a grill brush to scrape excess residue off stainless steel diffusers. But, use a nylon scrub pad on porcelain-coated metals or they’ll scratch.
Replace lava rock and ceramic briquettes when they are crumbling or the accumulated grease is hard to burn off. Replace the rock grates if they are rusted, or warped and don’t sit evenly.
On metal diffusers, areas of rust or burned-through metal, are signs they should be replaced.
Find Heat Diffusers for Your Brand
David B. February 18th, 2015
Posted In: BBQ Maintenance

The espresso gives this BBQ sauce an exceptionally rich color and depth of flavor. Tangy vinegar is balanced by molasses and honey, making it a delicious addition to chicken, ribs, and chops.
Makes: 4 1/2 cups
Add the oil to a large saucepan on medium heat. When it’s up to temperature, add the onions with a sprinkling of salt and cook until they’re soft and translucent (if they begin to brown, add a little cold water and give them a quick stir).
When the onions are done, add the garlic and cook for a couple minutes longer (be careful, garlic burns easily and turns bitter).
Add the rest of the ingredients, bring to a boil.
Lower the heat and simmer, without a lid, for about 40 minutes, stirring occasionally. (Keep an eye on the thickness, just stop cooking when the bbq sauce reaches a consistency you like.)
Enjoy!
David B. May 9th, 2014
Posted In: Marinades, Recipes, Rubs, Bastes, and Glazes, Sauces and Accompaniments
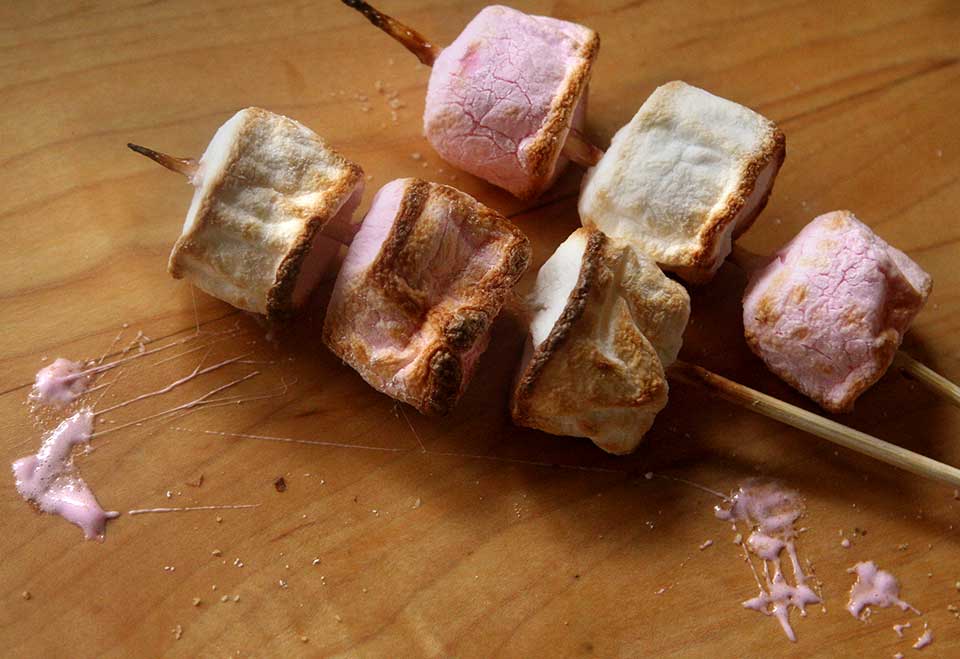
Do you count the days between camping trips? Do you dream of golden roasted marshmallows? Do visions of crispy blackened sugar balls haunt your sleep? Well, my friend, there is a better way.

Just like you would at a campfire, skewer the marshmallows. Hover them over the grill; close, but not too close.
A temperature of 500-600 F works perfect for me. I simply rotate the marshmallows over the heat for 30 seconds or so, and I’m done.
Slide the marshmallow(s) onto your cookie surface of choice.
Add some chocolate.
Properly squish it.
Eat.
And there you have it! S’mores in 30 seconds, at the end of every grilling session. Who needs camping?
David B. April 7th, 2014
Posted In: BBQing HowTos, Desserts and Fruit, Recipes

Maximum taste, minimum effort. If there was a tagline for roasted peppers, that would be it. Roasted peppers are perfectly suited to a BBQing or grilling. They’re quick to prepare, and simple to cook, and did I mention smokey delicious? Many people who dislike peppers raw, love them roasted. Roasting replaces the sharp bite with a pepper’s natural sweetness and aromatics.
Roasted peppers keep well in the fridge and you can use them to pep up sandwiches, burritos, salads, or just for general snacking and munching. I tend to buy a large amount when I see them on sale, there is no extra work and they are nice to have in the fridge for a week or so.
I’ve tried lots of different methods and techniques. You can oven roast them, foil them, oil them, foil and oil them.
What I don’t do is pop the peppers on whole. It looks impressive, and works for peppers where you would eat the seeds, but for bell peppers it’s much easier to de-seed them before they’re cooked.
Bell Peppers, red peppers, yellow pepper, green peppers.
1. Quarter, and de-seed and remove stalks of the peppers.
2. Pop them skin side down on the grill over medium high heat. Don’t turn them, leave them until the skin is very charred and burnt looking, but the flesh is tender and soft. About 10 minutes.
3. Take them off the grill and pop them in a bowl. Cover the peppers for about 10 minutes to steam them. This allows the skin to come off a lot easier and saves quite a lot of time.
4. Peel them and eat them.
5. Any leftovers are good for a week. Covering them in olive oil will help them to keep a little longer, and garlic cloves are a nice touch too. Enjoy.

David B. February 17th, 2014
Posted In: BBQ Maintenance

Utterly shocked. That’s how I felt after trying this the first time. Hyperbole? Well a little. If you’re mad about apples, applesauce, or apple cobbler, you’ll find this just as good.
A nice simple desert after a cooking session. What’s really great about this, is the smokey deliciousness that mixes with the apples.
4 to 6 apples (or pears as a variation)
4 tablespoons of butter4 tablespoons of brown sugar
4 graham cracker crumbs, ground almonds, or hazelnuts
1 teaspooon vanilla extract
1/2 teaspoon of lemon zest
1/2 teaspoon of cinnamon
1/4 teaspoon freshly grated nutmeg1/2 teaspoon ground cloves
2 or 3 cinnamon sticks
—
A small handful of wood chips
Prepare your BBQ for indirect cooking. Soak wood chips.
Core the apples or pears. You effectively want to dig a large hole out of the top, removing the core, but leaving a good 1/2 inch of core at the bottom. You can use a melon scooper for this job, but I prefer a sharp knife and butter knife.
Cream the butter and brown sugar, just like you would cookies, then add graham crumbs, vanilla, zest, spices. Mix, then fill the cored apples. Pop half a cinnamon stick in the top of each one and they’re good to go.
Add your wood chips, and cook until soft and done looking. You’re looking at about 30-60 mins, depending on your bbq temperature.
All done. These apples are begging for a few scoops of vanilla ice cream, if you’re of that persuasion.
David B. December 23rd, 2013
Posted In: Desserts and Fruit, Recipes
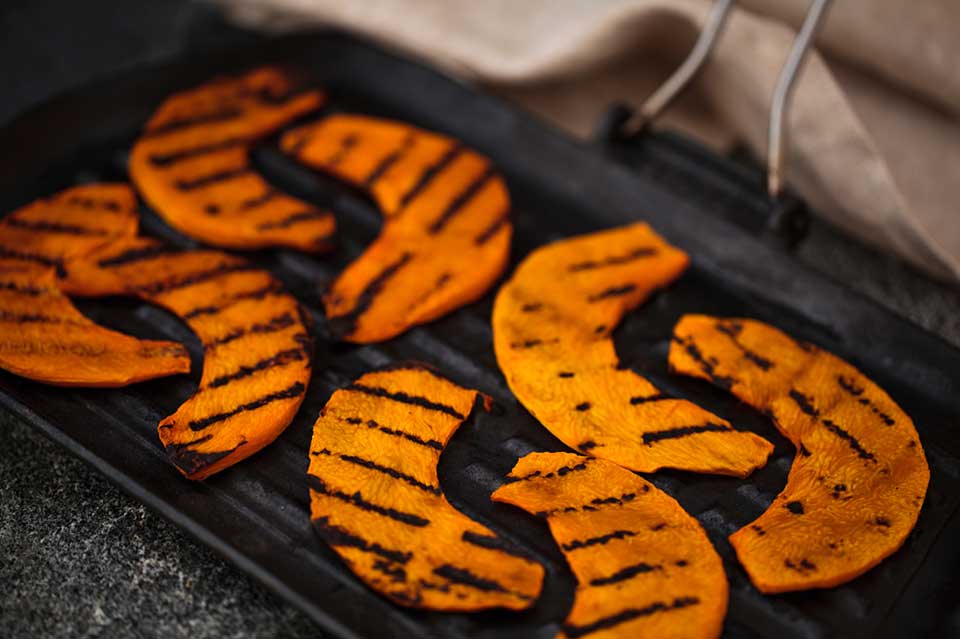
If you need an excuse to get out on the grill this Thanksgiving, here it is: Grilled Pumpkin. A savory treat that’s easy (provided you are careful cutting the pumpkin) and delicious.
Improvise as you like, pumpkin holds up well to lots of different flavors. Here’s a recipe to guide you.
1 Pumpkin (per 1 lb)
2 tablespoons smoked paprika
2 tablespoons olive oil
2 crushed garlic cloves
Preheat your grill / BBQ for medium-hot, direct grilling. Cut pumpkin into 1/2 inch thick wedges . Deseed
Tip: Leave the skin on so the pumpkin slices stay together. Trim off skin before serving if you like.
Mix paprika, olive oil and garlic in a bowl with the pumpkin.
Grill the pumpkin 3-5 minutes on one side, turn and cook until tender. The pumpkin slides should be fork tender.
David B. November 18th, 2013
Posted In: BBQing HowTos, Vegetables
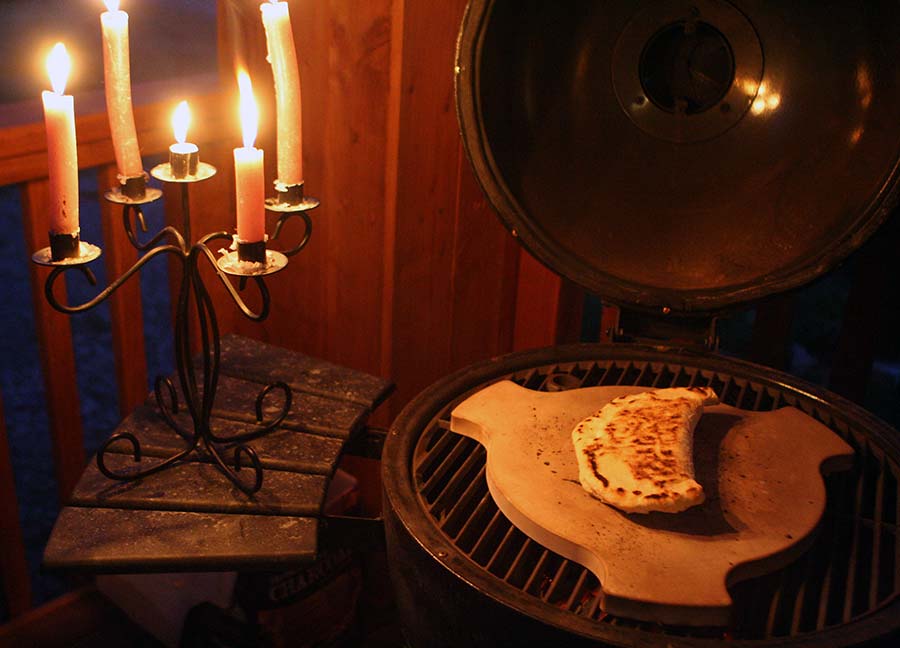
In the digital world that we live in, it’s always a little bit odd when you don’t have any electricity. Especially the unplanned, multi day kind on the back of a wind storm. That’s where I ended up, twiddling my thumbs (the physical kind), wondering what to do with myself. Barbecuing pizza is my go to recipe, but I’ve always been a bit reluctant to try calzones. This time, armed with with candles and the whole evening to spare, I cranked up my charcoal barbecue for some good clean fun.
1/2 cup warm water (110 degrees)
1 envelope instant yeast
1 1/4 cups water; at room temperature
2 tablespoons extra virgin olive oil
7.5 ounces of fine semolina flour (1 1/2 cups) + 14.5 ounces of bread flour (2 1/2 cups), OR 22 ounces bread flour (4 cups)
1 1/2 teaspoons of salt
Instructions for preparing the pizza dough are located here: BBQ Pizza – Revisted and Perfected
Fillings/toppings:
Pizza sauce (made or store bought)
Cheese
A variety of pizza toppings: pepperoni, peppers, mushrooms, pineapple, etc
You’ll also need:
A barbecue or grill with a lid
A pizza stone
Pizza peel – or a plate with some skill and/or luck
1. Preheat your grill or barbecue. Make sure your pizza stone is placed inside the barbecue before it warms up, otherwise you risk the stone cracking.
2. A calzone is a lot denser than a pizza, and you’ll need to be careful not to burn your calzone. You’ll want an even temperature of approx 475 to 500 degrees.
3. Prepare the calzone. Roll out your dough to a pizza like size and shape. On the pizza peel, spread out some cornmeal, then pop your soon to be calzone onto the pizza peel.
Put your ingredients (cheese, vegetables, meat, etc) on one side. Leave an inch around the outside, just as you would with a regular pizza. Close the lid, seal, and fold the seam over. This stops juices from the calzone running out. Don’t pierce the calzone, just leave it the way it is.
4. Warm your pizza sauce in a pot, infuse with olive oil, garlic, etc to give it more punch.
5. Slide the calzone onto the pizza stone and close the lid. Cook for about 6 minutes, and peak regularly, using a spatula to check the underside to make sure it’s not burning.
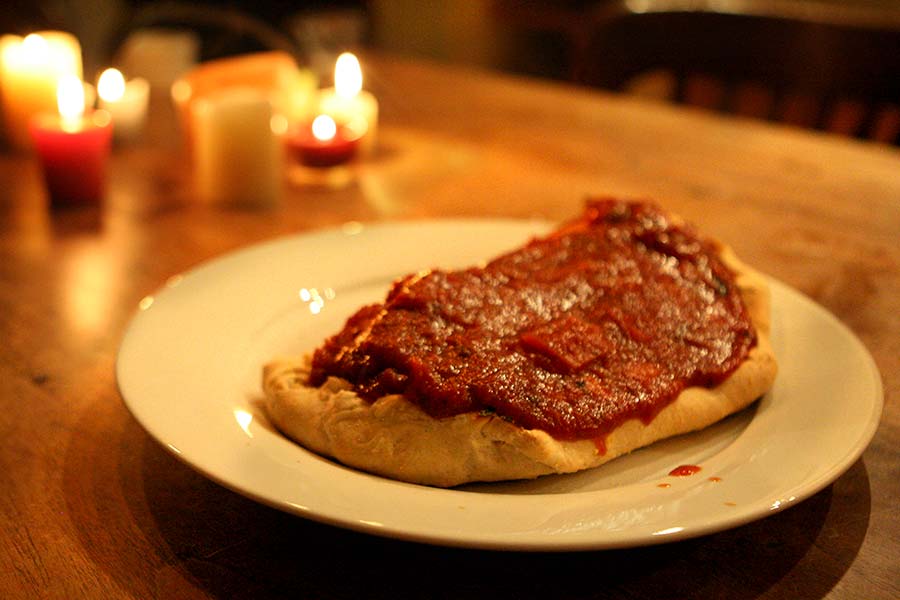
6. At about 6 minutes, or if you see any traces of burning, flip the calzone and cook for another 6 or so minutes.
7. Remove the calzone from the barbecue, and spread hot pizza sauce on top in excessive quantities.
8. Enjoy.
David B. October 15th, 2013
Posted In: BBQ Maintenance

Ideally, try to get grass raised sausages from a local butcher, or good supermarket. Look at the ingredients, are they filled full of fillers, and preservatives? Then there is a pretty good chance they be pretty tasteless. Make sure they’re uncooked, not precooked sausages too.
You can cook sausages indirectly or directly, but I think they taste best and are easiest, barbecued indirectly with the lid down.
Indirect grilling
If you were to bake sausages in the oven, you’d cook them at 350 degrees for 20 mins, and that’s exactly what you’d do with a barbecue. Set up your barbecue or grill for indirect grilling, at 350 degrees. Cut the sausages between the links, and place sausages on the grid with as much flamboyance as you can muster. Close the lid, and that’s it. Open it back up in about 20 mins. Exceptional grilled sausages.
Direct grilling
It’s more difficult to grill sausages directly, and you do have to tend and keep turning them, but it’s still pretty simple with practice.
The most common problem people have when grilling is to have the temperature too high. That normally means the sausages will burn on the outside before they cook completely in the middle. Or look great on the outside, but still pink in the middle.
Make sure you keep your sausages as far from the heat as possible and keep it turned way down. Just like the indirect method, you want to grill your sausages low and slow, turning frequently.
Whichever way you decide to cook them, it’s important to regularly keep an eye on the temperature of your sausages. They need to be at 160 degrees, any higher and they start to dry out quickly. Any less and they will be undercooked.
David B. September 13th, 2013
Posted In: BBQing HowTos
Spring is in the air (well mostly!), and there’s never a better time for fajitas, especially smokey grilled ones. These are incredibly easy to prepare, and versatile enough to skip or fudge ingredients if you don’t have them readily available. I think fajitas require an excessive amount of bell peppers, they really make or break a good fajita, so I use 6 peppers and store any extras in the fridge for throwing on sandwiches or tossing with some pasta.
Combine the chilli powder, ground coriander, cumin, garlic powder, salt and black pepper in a small bowl.
Rub the spice mix into the meat, and let sit for 20 minutes.
Squeeze the 3 limes over meat and spices, and let sit for at least 30 mins, preferably 1-2 hours.
Light up your barbecue or grill. You want a moderately high heat for this, firstly to char up the peppers, then the meat, and finally to soften the tortillas.
Cut the bell peppers in half, core and deseed. Cook directly on the bbq grid. Make a pouch with aluminium foil for the onions and cook beside the bell peppers.
You want the pepper’s skin to go black and charred. Cook until the onions and peppers both feel soft. Remove from the grill, and pop the peppers in a bowl and cover with plastic wrap. Let the peppers steam in the bowl for 15 minutes.
After the peppers have steamed, the charred skin should peel easily off. Remove all the skin, and slice the peppers into strips lengthwise, and set aside for serving.
Now that the vegetables are finished, it’s time to grill up the beef.
If you have wood chips available, throw a small handful of unsoaked woodchips on your coals, or add to your smoke box.
Grill the steaks to taste. 1 to 2 minutes per side, for thin steaks at med-rare, for example.
The best way to make tortillas soft and pliable (and a little smokey) is to warm them on your cooking grid. It’s very quick to do, and you can usually do a number of tortillas at once. You don’t want to burn the tortillas, but only to warm them. 15 seconds per side is normally enough, but keep a close eye on them so they don’t start getting crispy.
Each guest can prepare their own fajita by adding spoon full of cilantro, jalapenos, sour cream, beef, onions, and bell peppers. A squeeze of lime juice is a nice finishing touch. Enjoy!
David B. May 6th, 2013
Posted In: BBQ Maintenance